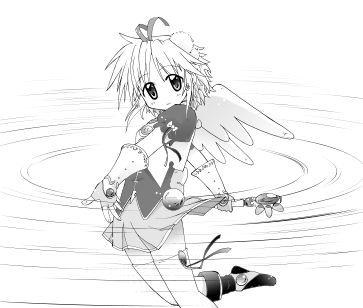
デジタル漫画制作ソフトには便利に線が描けるツールがたくさんあります。種類が多いため今すぐ描きたい線があっても『どのツールだっけ?』となることが多いです。
 あかにゃん
あかにゃん背景のパースに合わせて線を描きたいにゃ
 あおにゃん
あおにゃんパースの付いた同心円は描けますか?
 すいへい
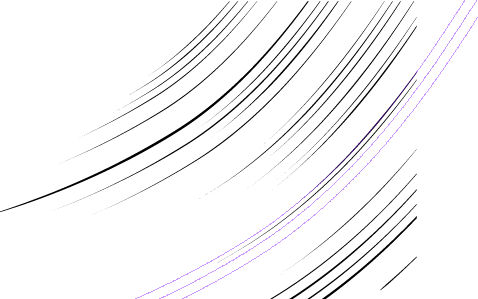
すいへい便利なツールを今すぐ使えるように簡単に解説します。下記の画像を見て自分の描きたい線を見つけてください
※このページではクリスタのバージョン4で説明しています。バージョン1~3もほぼ同様です。
漫画制作には勢いが必要です。その勢いを止めないで済むように簡潔に紹介していきます。3分くらいで1種の線が描けると思います。
紹介する『線』の描き方はこちらです。
- 背景のパースに合わせた線
- 平行線
- パースのついた同心円
- 曲線
背景のパースに合わせた線
※集中線ツールを利用すると背景パースにピタリと合わせるのは至難の業。パース定規を使います。
平行線
パースの付いた同心円
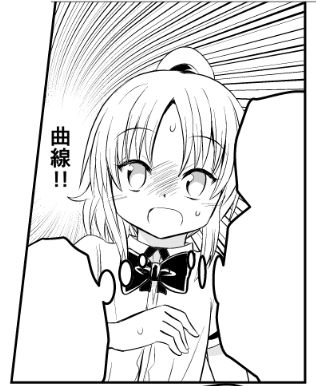
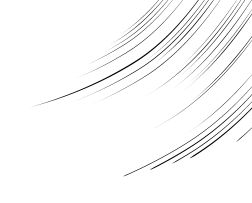
曲線
消失点のある曲線1。
消失点のある曲線2。
消失点の無い曲線。
漫画家。PN水兵きき。連載10回立ち上げ。クリスタ検定(マンガ)合格。ココナラ漫画添削PRO認定。連載中→ナナイロコミック『娼館を統べる闇の貴族に転生した』
自由自在に線を描いて、より読者を楽しませる漫画制作を!
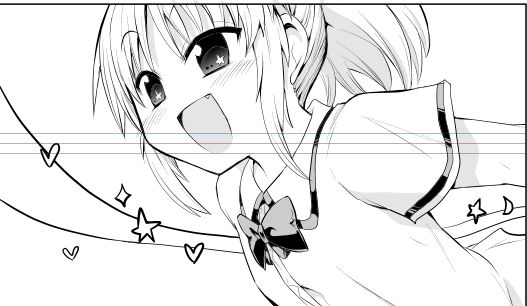
変則な線1 背景のパースに合わせた線
ここでは背景のパースに合わせた線の描き方を解説します。
背景に合わせた線
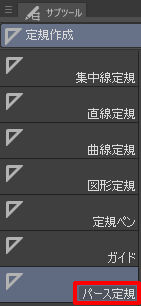
定規作成ツールを選択します。
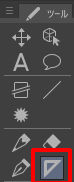
サブツールの『パース定規』を選択します。
背景のパースに合わせて線を2本描きます。ズレないように注意します。
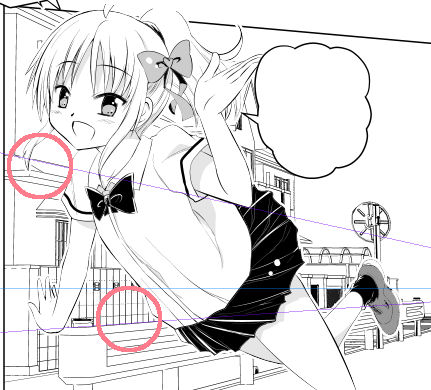
背景のパースに沿った線をペンツールで描けます。パースに合わせて好みの線を描いてこれで完成です。
背景のパースとキャラの向きがあっている時に利用できます。
すいへいキャラが走っているときなどに便利な線の描き方です
変則な線2 平行線
ここでは主にキャラの動きを表現するのに便利な平行線を解説します。
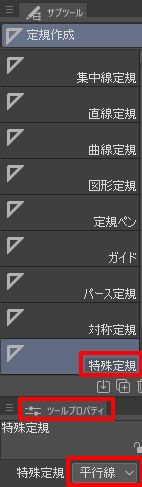
定規作成ツールを選択します。
サブツールで『特殊定規ツール』を選択し、ツールプロパティで『平行線』を選択します。
ツールをドラッグして、平行線の『アタリ』を作ります。
ペンツールでお好みの密度、長さ、太さの線を描きます。
キャラの動きを出したい時に利用します。キャラの向きに合うように描きます。
すいへい歪むことがないので、手だけで描くよりきれいに描けます
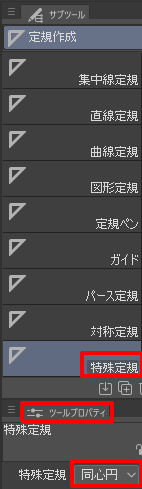
変則な線3 パースのついた同心円
ここではキャラがくるくる回るような同心円を解説します。
パースのついた同心円
『定規作成ツール』を選択します。
サブツールで『特殊定規』を選択し、ツールプロパティで『同心円』にします。
ツールをドラッグして楕円型に調整してクリック(もしくはENTER)をします。
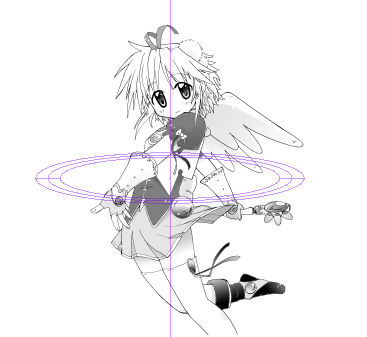
手前の幅は広く、奥は狭く補足描画します。これで完成です。
キャラや物の回転を表現するときに利用します。
ツールプロパティの『縦横比固定』にチェックを入れるとパース無しの同心円が描けます。
変則な線4 曲線
ここでは消失点がある曲線2つと、消失点の無い曲線を紹介します。
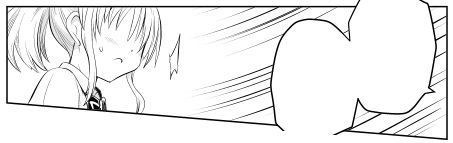
消失点のある曲線
まず『コミックツール』の中の『集中線ツール』を選択します。
集中線ツールのツールプロパティで必ず『曲線化』にチェックを入れてから集中線を描きます。(非表示の場合は右下のスパナからサブツール詳細を開きチェックを入れます)
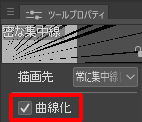
ここでは直線の集中線が描かれます。
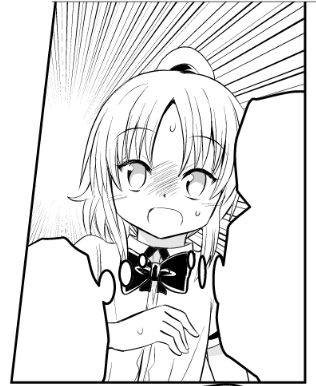
『操作ツール』➡『オブジェクトツール』を選択します。

赤枠の赤点を操作し、曲線を調整し完成です。(曲線化にチェックを入れないと表示されません)
キャラの感情や動きを表現できます。
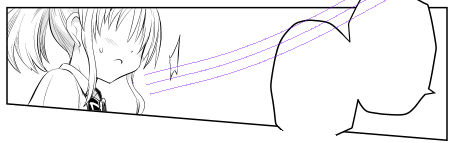
消失点のある曲線2
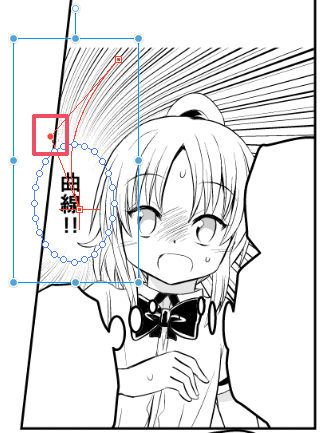
定規作成ツールを選択します。
サブツールの『特殊定規ツール』を選択し、ツールプロパティで『放射曲線』を選択します。
『スプライン』か『2次ベジェ』を選択します。
『スプライン』か『2次ベジェ』の使いやすい方で曲線のアタリを描きます。少し慣れが必要です。
ペンツールでお好みの密度の線を描きます。
こちらもキャラの感情や動きを表現できます。
消失点の無い曲線
定規作成ツールを選択します。
サブツールで『特殊定規』を選び、ツールプロパティで『平行曲線』を選びます。『スプライン』か『2次ベジェ』を選択します。
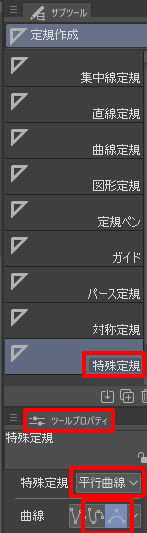
『スプライン』か『2次ベジェ』の使いやすい方で曲線のアタリを描きます。少し慣れが必要です。
ペンツールでお好みの線を描きます。
キャラの感情や動きを表現できます。風などを描くのにも使えます。利用できる所は多いです。
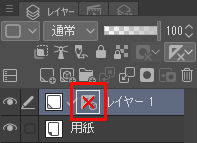
定規を簡単に非表示にする方法
進行具合をチェックする時に定規は邪魔になります。非表示にする方法はこちらです。
『shift』を押しながら、レイヤーウインドウの『定規アイコン(赤枠)』をクリックします。
↓
その他にも『定規アイコン』を右クリックし『定規の表示・非表示』を選択できます。
線が漫画に与える影響は?
アナログで描くには中々難しい線をデジタルならやり方を学べば自由自在に描けます。
線は漫画にとってとても大きな要素です。
線が少し普段と違うだけでマンネリ化した見た目を変えることができ、読者を飽きさせない工夫にもなります。
すいへい見た目をマンネリ化させないというのは漫画にとってとても大切です
今の時代では飽きてしまうと他に無限とも言えるほどの漫画が溢れています。読者が離れないように飽きさせない努力が必要です。
漫画の見栄えはこちらも参考にどうぞ。
【3分で解決】今すぐツールで『変則な線』が描ける!【曲線・同心円】まとめ
このページで紹介したような特殊な線を漫画制作途中に描きたいと思っても、やり方がわかわずに出来る範囲で別の線で妥協してしまうことがあります。
思いついた線を簡単に表現できるのがデジタルの良い所です。少し調べる時間を作ってでも表現の幅を広くした方が良い漫画になると思います。
集中線や流線の基本的な描き方はこちらもどうぞ。
キーボードのショートカットも覚えて時短漫画制作を。